Video Doorbell Camera: Optimal Mounting Angles for Detection
By Amara Kovács • 6th May
Introduction
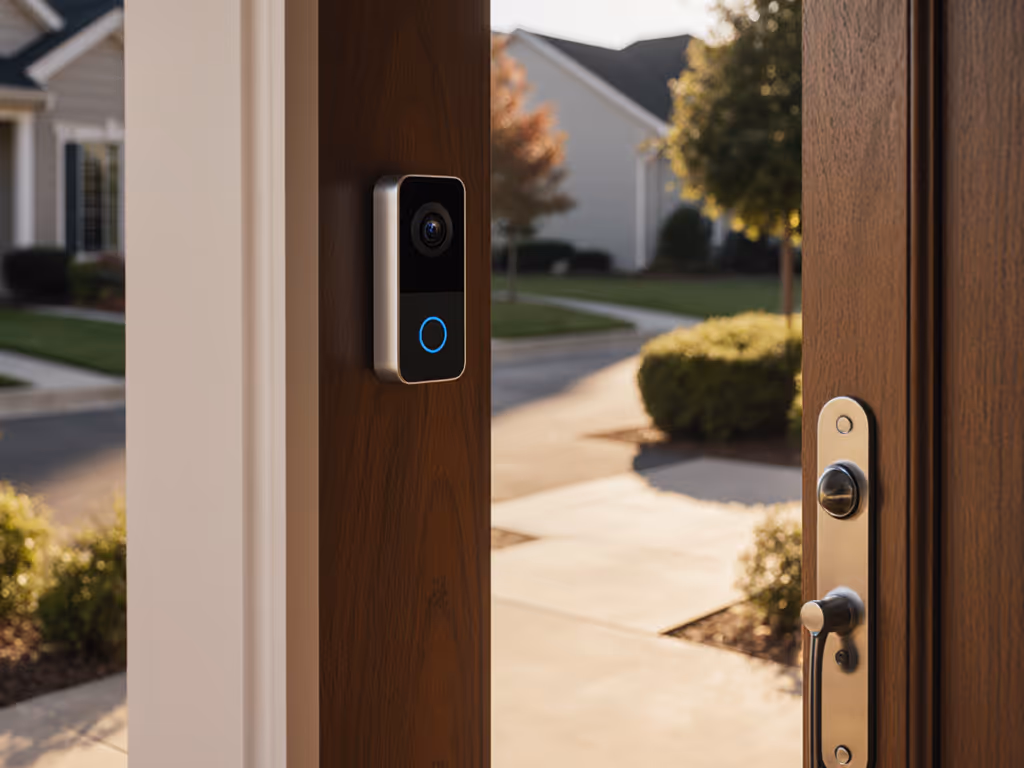
Most people install a video doorbell camera and expect it to simply work. They position it at eye level, plug it in (or charge it), and assume the problem is solved. Within days, they're drowning in false alerts: a passing car, a shadow from a tree, a neighbor walking past. They either disable notifications entirely (defeating the purpose) or pay for a subscription tier promising "person detection" to filter the noise.
What they often don't realize is that angle (not just the camera model) controls how many useless alerts flood your phone and how long you'll actually use (and pay for) the system. The right mounting angle reduces false alarms, improves package detection, clarifies what's actually at your door, and ultimately affects your lifetime cost. Security camera positioning isn't glamorous, but it's the lever that makes the difference between a tool you trust and a toy you eventually disable.
This guide walks through the angles that matter, why they matter, and how to dial yours in (whether you're a renter with adhesive tape or a homeowner reaching for a drill).
FAQ Deep Dive
Why Does Mounting Angle Matter So Much?
The answer is both optical and practical.
Optically, angle determines what the sensor sees. A doorbell angled too high captures mostly ceiling and porch roof, which is useless framing that fills your footage with static and doesn't show faces or packages. Angled too low, you get feet and shadows instead of faces and delivery boxes. The field of view is fixed (typically 140-180 degrees), but where that view points is everything.
Practically, a bad angle creates noise. Your doorbell's motion detection triggers whenever something moves in its view: a car two houses down, tree branches, the mail carrier's shadow three feet away. If 90% of your alerts are false, you'll either ignore the real ones or seek an app setting that mutes notifications (and then miss actual deliveries). Some users end up purchasing a higher-tier subscription plan, imagining that "advanced filters" will solve the problem. Often they don't; the angle was the real culprit.
From a cost perspective, here's the link: if your doorbell generates so many false alerts that you lose trust in notifications, you'll either abandon the device entirely (sunk cost) or chase a subscription plan promising better detection. Total cost includes batteries, cloud, and your time... and time spent managing alerts drains fast. An angle that reduces false alerts by 60-70% doesn't just save your sanity; it also removes the pressure to upgrade.
What Is the Optimal Doorbell Mounting Height?
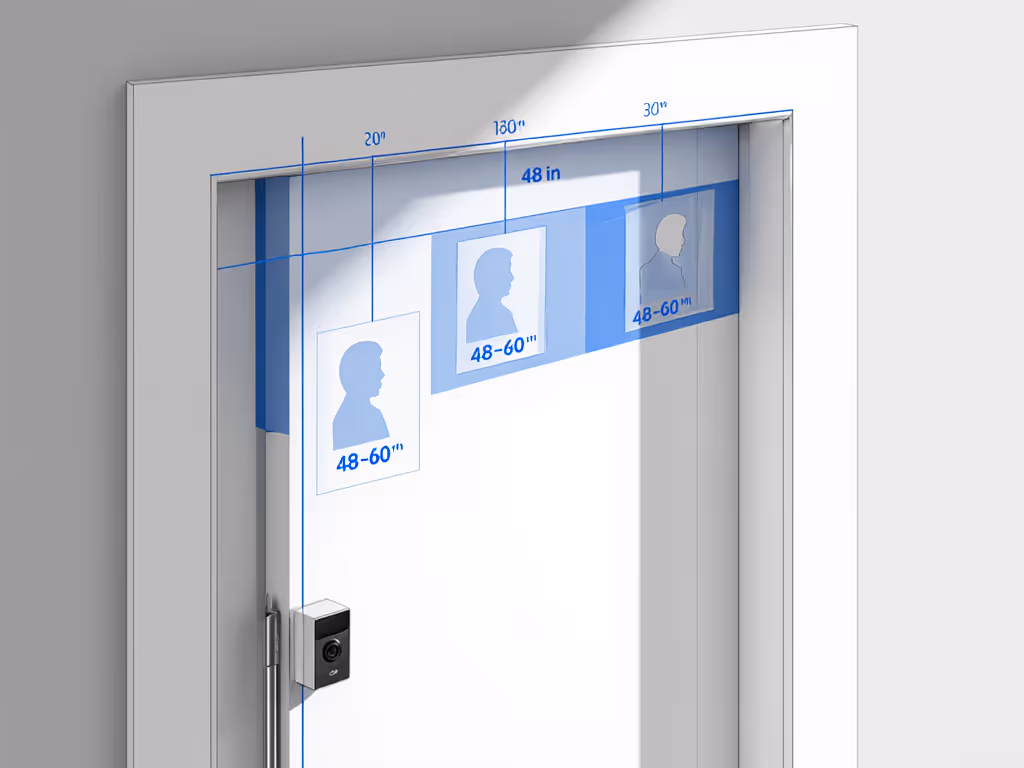
For a standard residential door, aim for 48-60 inches (4-5 feet) from the ground to the center of the camera lens. This height typically captures faces at natural conversation level and packages placed at the door or on the ground in front of it.
Why this range?
- 48-52 inches: Ideal if your typical visitor is a delivery courier or if packages are frequently left directly on your doormat. You'll see faces in profile as people approach and the drop-off moment clearly.
- 52-60 inches: Better for households with taller occupants or where you prioritize seeing approaching pedestrians earlier. You capture more of the walk-up and less "top of the head" footage.
- Below 48 inches: Tilts the view downward too much; you miss faces and upper-body recognition. Not recommended unless your door is recessed or your porch is unusually tall.
- Above 60 inches: Wastes field of view on the roof, catches fewer package moments, and may angle down steeply enough to create glare on glass doors.
For renters or narrow stoops, adjust within reason based on your door's frame and your landlord's tolerance. Even a 4 inch difference in height can meaningfully reduce false alerts from sidewalk foot traffic.
How Should I Angle the Camera - Straight Out, or Tilted Down?
Here's where most installations go wrong.
Straight out means the camera's lens is roughly perpendicular to your door's plane, pointing horizontally into your porch or entrance area. This is the baseline. It maximizes the view of your entryway and catches approaching visitors head-on.
Tilted down (typically 10-25 degrees below horizontal) is often necessary in practice:
- If your porch is sunken below street level, a slight downward angle brings the sidewalk and approaching feet into view.
- If you're concerned about package placement at ground level (not just delivery to hand), angle down to see the drop-off moment.
- If your doorway is recessed or your door is set back from the facade, a downward tilt compensates for the depth.
The trade-off: Tilting down too much (>30 degrees) reintroduces false alerts because you're now capturing more sidewalk and street traffic. You're also more likely to catch sun glare and blown highlights during morning and evening hours if the camera looks down-sun.
Practical rule: Start with a slight downward tilt of 10-15 degrees. This captures both faces and packages without overshooting into "mostly sidewalk" territory. You can adjust after reviewing a week of footage. If your view still misses the doorstep or faces, consider angled wedges and mounting fixes tested to correct FOV without relocating the doorbell.
How Do Glare Reduction Angles Factor In?
Glare is the silent threat to usable video. If your doorbell is mounted on a west-facing door and the afternoon sun hits the lens at a shallow angle, you'll get lens flare, washed-out colors, and unusable night-vision compensation (the camera over-brightens trying to compensate for perceived backlight).
To minimize glare:
- Position perpendicular to direct sunlight: If your door faces west and catches afternoon sun, aim your mounting spot so the sun is behind the camera, not in front of it. This often means angling slightly left or right if your door frame allows.
- Tilt to avoid reflecting surfaces: Glass storm doors, metallic trim, and highly reflective paint behind the camera (on the porch ceiling) can bounce light into the lens. A slight sideways or downward tilt may avoid the bounce.
- Use a porch canopy or shade: If glare is unavoidable, a small awning, soffit, or even a light fixture above the camera can diffuse midday sun.
- Test in morning and evening: The worst times are sunrise and sunset, when sun is at lens height. For deeper help managing blown highlights, see how HDR doorbell cameras tame harsh lighting. Review footage from these times; if the image is washed out, adjust the angle 5-10 degrees and test again.
This matters for angle adjustment techniques because it's not just about what the camera sees, it is about whether what it sees is usable. A perfectly angled camera aimed at a blown-out sunset is worthless for identification or package proof.
Does Mounting Angle Affect Night Performance?
Yes, and in ways people often overlook.
If your doorbell is angled to see a lot of reflective surface (a shiny door, a mirrored side table, polished metal trim), the infrared LEDs will bounce off those surfaces and scatter in the lens, creating IR bloom and glare that washes out the image. The camera's night vision will look milky, and faces won't be recognizable.
To optimize night:
- Angle the camera to minimize the reflective surfaces in the field of view. If possible, point slightly away from a reflective door.
- Ensure the camera isn't aimed directly at a window or glass storm door; reflection and IR bounce kill night mode. To improve low-light clarity and cut IR glare, follow our night vision optimization guide.
- If you have a porch light on at night, angle to avoid pointing directly at the bulb; backlighting confuses the exposure and turns the scene into silhouettes.
Renters often have limited control here, but even a 5 degree shift sideways can reduce glare significantly. Budget the batteries, too: poor night-mode image quality (lots of processing, over-brightening compensation) can increase power draw, especially on battery-powered models in winter.
What If I'm a Renter? Can I Still Optimize Angle?
Absolutely. Renters often use adhesive mounts or stick-on brackets, which come with adjustable arms or rotating bases. For non-permanent setups and landlord-friendly hardware, see our no-drill doorbell installs.
Angle-adjustment techniques for renters:
- Mount slightly above the ideal 48-60 inch range (say, 62-66 inches) if your door frame and trim allow. Landlords are less likely to notice a camera tucked near the top of the frame.
- Use a stick-on bracket with a ball joint or articulating arm, allowing you to dial in tilt and rotation without touching the mount itself after installation.
- Adhesive mounts degrade over time; check quarterly and adjust if the angle drifts as the adhesive softens.
- Take photos and measurements during install so you can restore the angle if you reinstall (important for end-of-lease removal and security deposit recovery).
For renters in hallways (apartments, condos), check your lease or building policy first. Many buildings prohibit outward-facing cameras or require approval. An inward angle (facing your door, not into the common hallway) may be your only legal option. In that case, prioritize capturing package placement at your door rather than approaching visitors, a worthwhile trade-off in shared housing.
How Do I Test and Fine-Tune Angle?
Here's a practical workflow:
- Install at your best guess (48-55 inches, straight out or 10 degrees down, avoiding direct glare).
- Record for 3-7 days without adjusting. Capture a normal range of activity: deliveries, visitors, weather changes.
- Review footage during active motion alerts. Ask:
- Can I identify the person or package? (Y = good angle; N = adjust)
- How many alerts were for actual visitors vs. sidewalk traffic or shadows? (Aim for 70-80% real events.)
- Are faces visible during night mode? Are they clear, or milky and glare-filled?
- Adjust incrementally: Move 2-5 degrees at a time (tilt or rotate), not 15 degrees. Small changes yield data; large jumps obscure cause.
- Re-test for another 3-7 days after each adjustment. Document the angle in writing (e.g., "48 inches high, 12 degrees down-tilt, angled 3 degrees left toward porch corner").
This iterative approach is how you discover your optimal angle, not the manufacturer's generic recommendation, but the one that works for your door, porch lighting, traffic patterns, and climate.
How Does Angle Relate to Security Camera Positioning Beyond Doorbells?
If you're considering adding a second camera (a side-yard view, an indoor hallway camera, a business storefront camera), the same principles apply:
- Height: 4-6 feet for face-level capture; higher for overview and wide coverage.
- Tilt: Slight downward tilt (5-20 degrees) to see approaches and ground-level activity.
- Glare avoidance: Point away from windows, mirrors, and direct sunlight.
- Field overlap: Position second cameras to cover blind spots of the first, not to duplicate the same zone.
For businesses, this gets more complex. You may want overhead views for traffic counting or multiple angles for liability evidence, but the angle optimization logic remains: clear sight lines, minimal glare, motion detection focused on zones that matter (entry, counter, stock area), and false alerts minimized.
Summary & Final Verdict
Optimal video doorbell camera mounting is not a one size fits all prescription; it's a calibration. The range of 48-60 inches high, angled 0-15 degrees downward, avoiding glare and reflective surfaces, will cover 95% of residential scenarios. But the final 5% comes from testing your setup and iterating.
Here's what matters most: an angle that reduces false alerts improves your trust in the device. When you trust notifications, you use the camera, and there is no need to chase subscriptions or upgrades chasing a "better" solution.
That's where cost clarity enters. The camera's price is fixed, but whether you'll subscribe to cloud storage, upgrade to a higher tier, or buy a replacement battery sooner depends partly on how well your angle minimizes frustration and noise. Total cost includes batteries, cloud, and your time... and a well-angled doorbell respects your time.
Final verdict: Before you assume your doorbell camera isn't working, before you blame the model or consider a pricier alternative, dial in your angle. Measure the height. Angle slightly downward. Avoid glare. Test for a week. Adjust by 2-5 degrees and test again. Most false-alert complaints and feature envy stem from angle, not hardware. Spend an hour on positioning now, and you'll save months of regret and unnecessary upgrades later. That's clarity on total cost in action.
Related Articles